The eero Max 7 is yet another high-performance router and mesh Wi-Fi kit that is now selling in Singapore, as 10Gbps fibre broadband becomes cheaper and more common in homes.
Connecting to your Internet service provider’s optical network terminal (ONT) or fibre modem, the eero Max 7 lets you link up everything at home, including your phone, PC, TV and other smart devices via Wi-Fi 7.
If you’re upgrading to a 10Gbps fibre plan, it’s one of the new Wi-Fi kits that will catch your eye. It’s sold as a standalone mesh Wi-Fi router and also as a two- and three-kit bundle.
On paper, at least, the eero Max 7 kit offers 10Gbps wired links and 4.3Gbps Wi-Fi 7 connections that promise to let you get the max out of your ultra-fast fibre service.
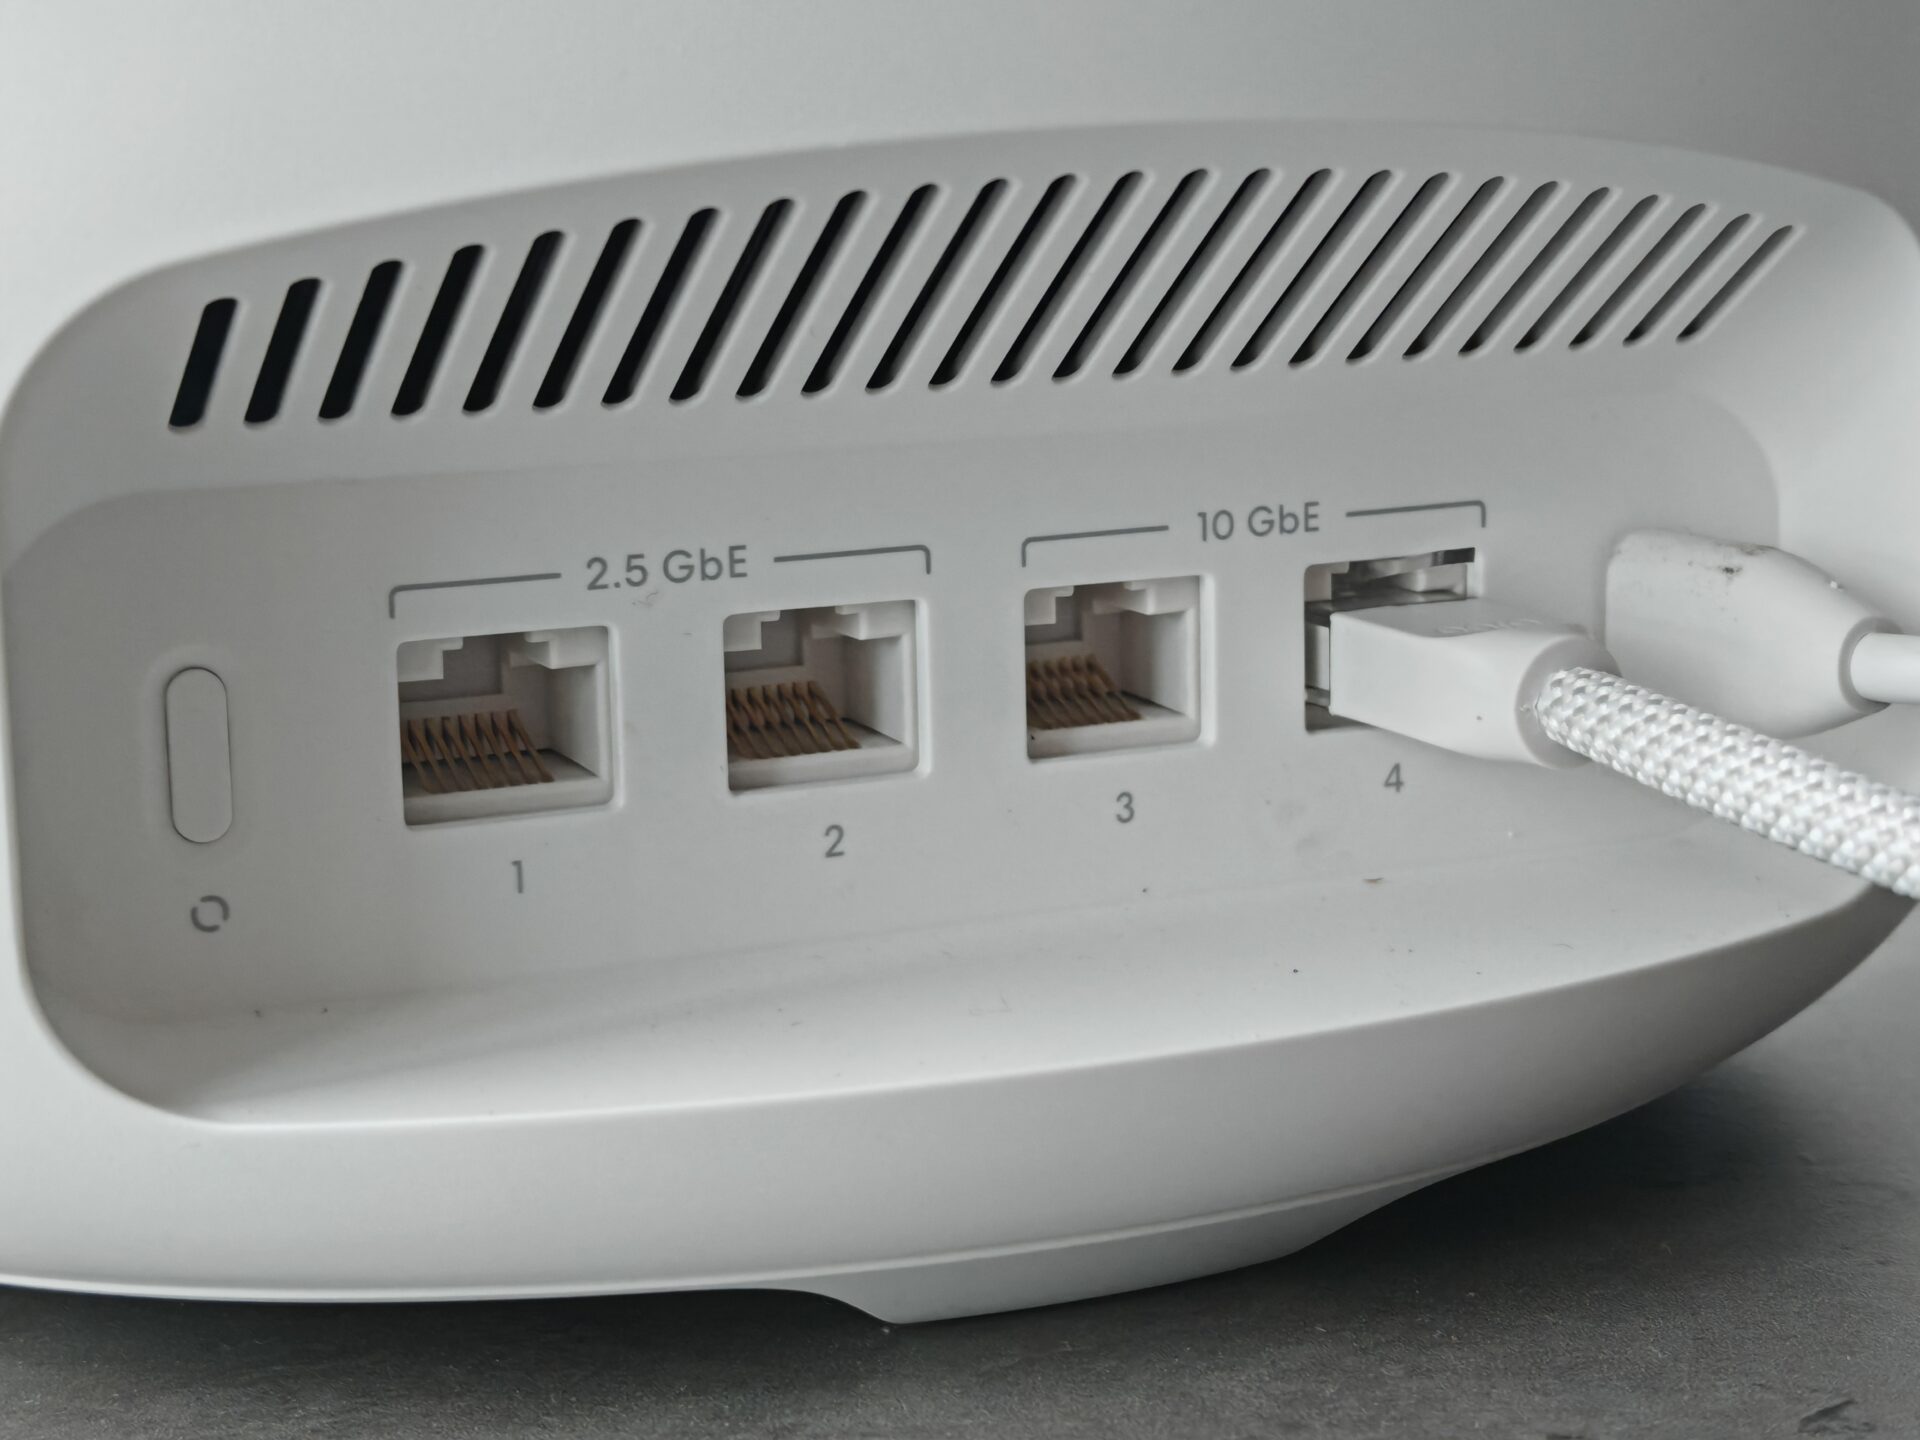
Like other similar Mesh Wi-Fi offerings, it comes with four Ethernet ports. Handily, there’s one 10Gbps port to hook up to the ONT and a second 10Gbps to connect, say, to your desktop PC or another eero Max 7 device in another room.
The other two Ethernet ports are 2.5Gbps so you still get great connectivity, say, for network storage drives that support the faster wired links than the more common 1Gbps used in most homes today.
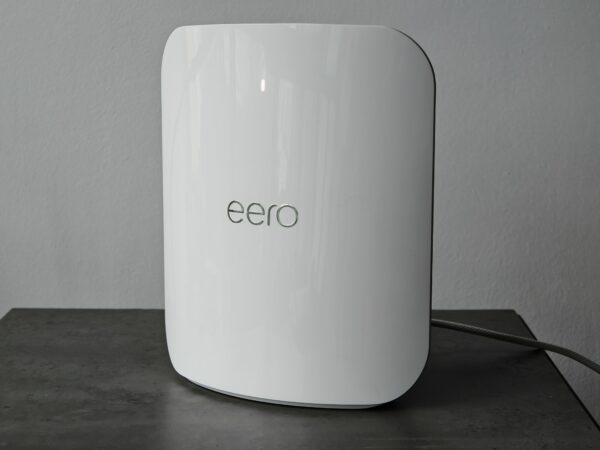
Do remember to leave some shelf space for the eero Max 7 because it measures 18.4 x 22.1 x 89.9 cm, or about the size of a big hardcover novel.
Besides a small Power/Reset switch, a USB-C port for power and exhaust grilles for heat dissipation, the eero device is a basic oval cylindrical white box that will not look out of place in any modern living room.
That said, having a black option would hide its presence better. Notably, the LED indicator will only appear after some time when the unit is switched on so do not panic when you install it for the first time.
Setting up the eero Max 7 is one of the simplest installations I have encountered. I downloaded the app on the smartphone, registered an account and the app proceeded to look for the eero router via Bluetooth.
By using Bluetooth, I do not need to hook my laptop using the network cable or hunt for its the default Wi-Fi network to start the installation process. Very convenient.

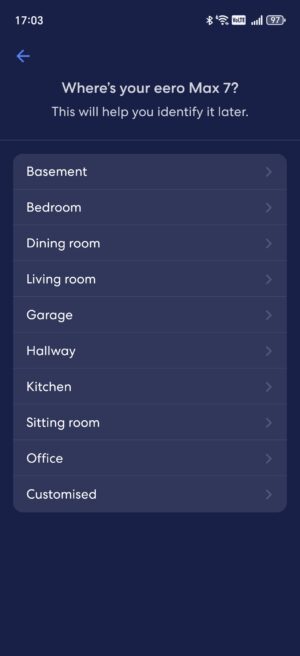
It automatically senses the network and quickly establishes a link to your ISP. After that, add a unique SSID (the Wi-Fi network name) and password before labelling the device’s location for easy identification during troubleshooting.
Adding a new node is also very fast. After switching on the additional node, click on the ‘+’ icon at the top right corner of the app and follow the steps to get it up and running.
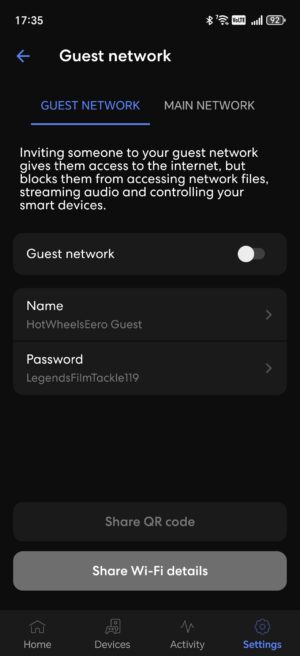
The eero app also lets you create a guest Wi-Fi network to isolate your private network from other users. In other words, a more secure network when you have visitors coming over during the festive season and for a party.
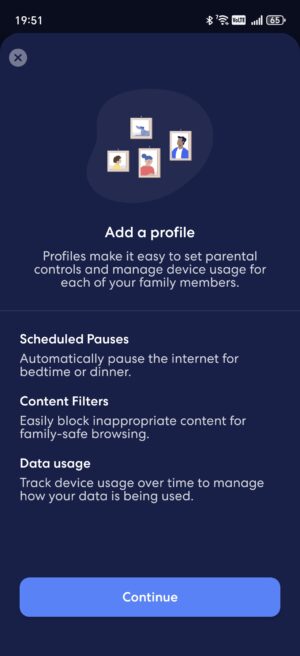


Restricting Internet usage through the app is complicated though. First, set up a “profile”, say Bedtime, so the children will not have Internet access at bedtime.
Indicate the time the Internet access is restricted and the days on which the period will be applied. After that, you can add the profile to the devices for the restrictions to work.
I tried to apply another profile to the same device with longer Internet access on weekends, but the app does not allow it, which is quite a disappointment.
Additional safety features for the router, such as Password Manager, VPN, Antivirus and most importantly, the network controls, are hidden behind a paywall subscription that costs S$149.98 annually.
Behind the paywall is also a wireless signal heat map app, which is useful when looking for the best locations to place your mesh routers for the optimal coverage.
Advanced users who want to customise their network and security settings or improve the network speed will find this unacceptable. After all, you get this free with other manufacturers.
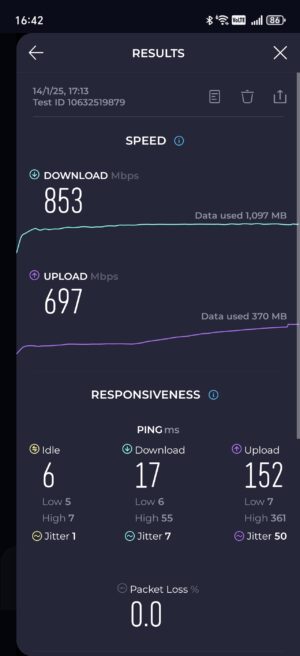
If you are a unfussy user who is not concerned with the router’s nitty-gritty details, the performance of the eero Max 7 mesh system is quite good.
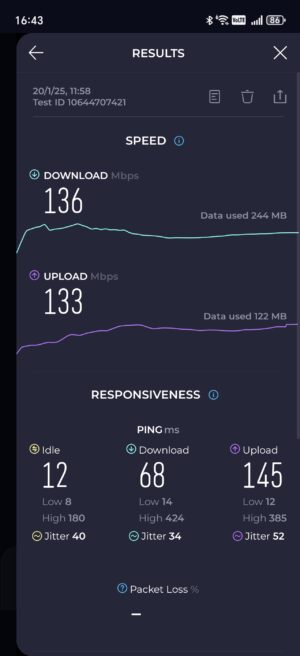
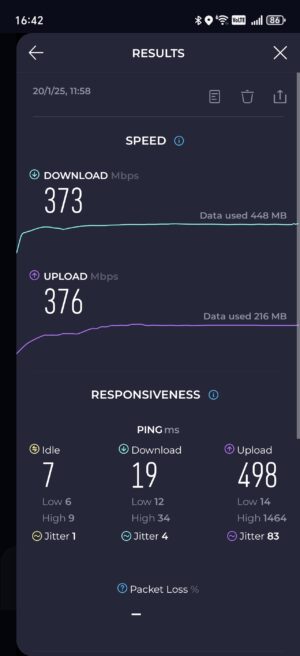
With the best coverage, it reached 853Mbps on Wi-Fi using my current 1Gbps service. In my bedroom, where the coverage isn’t ideal, the eero Max 7 can achieve a maximum speed of 373Mbps, about three times faster than my current Linksys Wi-Fi 6 router’s 136Mbps.
I also transferred a 1GB test file from my network drive to my phone and it took less than 2 seconds to download when I was next to the gateway router and about 3 seconds in my bedroom with the second eero Max 7 router.
What’s more, I have used one fewer node in the house than my older Linksys Wi-Fi 6 mesh network. It’s a compelling reason to upgrade to the newer technology.
So, if you want to improve the network speed in your home’s Wi-Fi dead spots, the eero Max 7 helps out without much fuss.
That said, I will still need at least two nodes for the Wi-Fi signal to propagate throughout my apartment, which is typical of many in Singapore, so prepare your budget when considering getting the eero Max 7.
For many still on 1Gbps fibre plans, Wi-Fi 6 setups should still be good. However, if you’re upgrading from older Wi-Fi or are setting up a new network at your new home, jumping on Wi-Fi 7 could be the ticket to hooking up at 10Gbps fibre speeds.
What sets back the eero kit is its price. The eero Max 7 costs S$799.99 for a single unit, S$1,449.99 for a two-pack, and S$2,049.99 for a three-pack for bigger spaces.
It is not cheap for what it offers, and its value can only be measured if all your devices at home show improved Internet service speed, especially when gaming.
Unfortunately, for such an expensive setup, not having the full suite of network and security features for free will count against the excellent hardware.


